Garlic Scape and Happy Rich Omelette

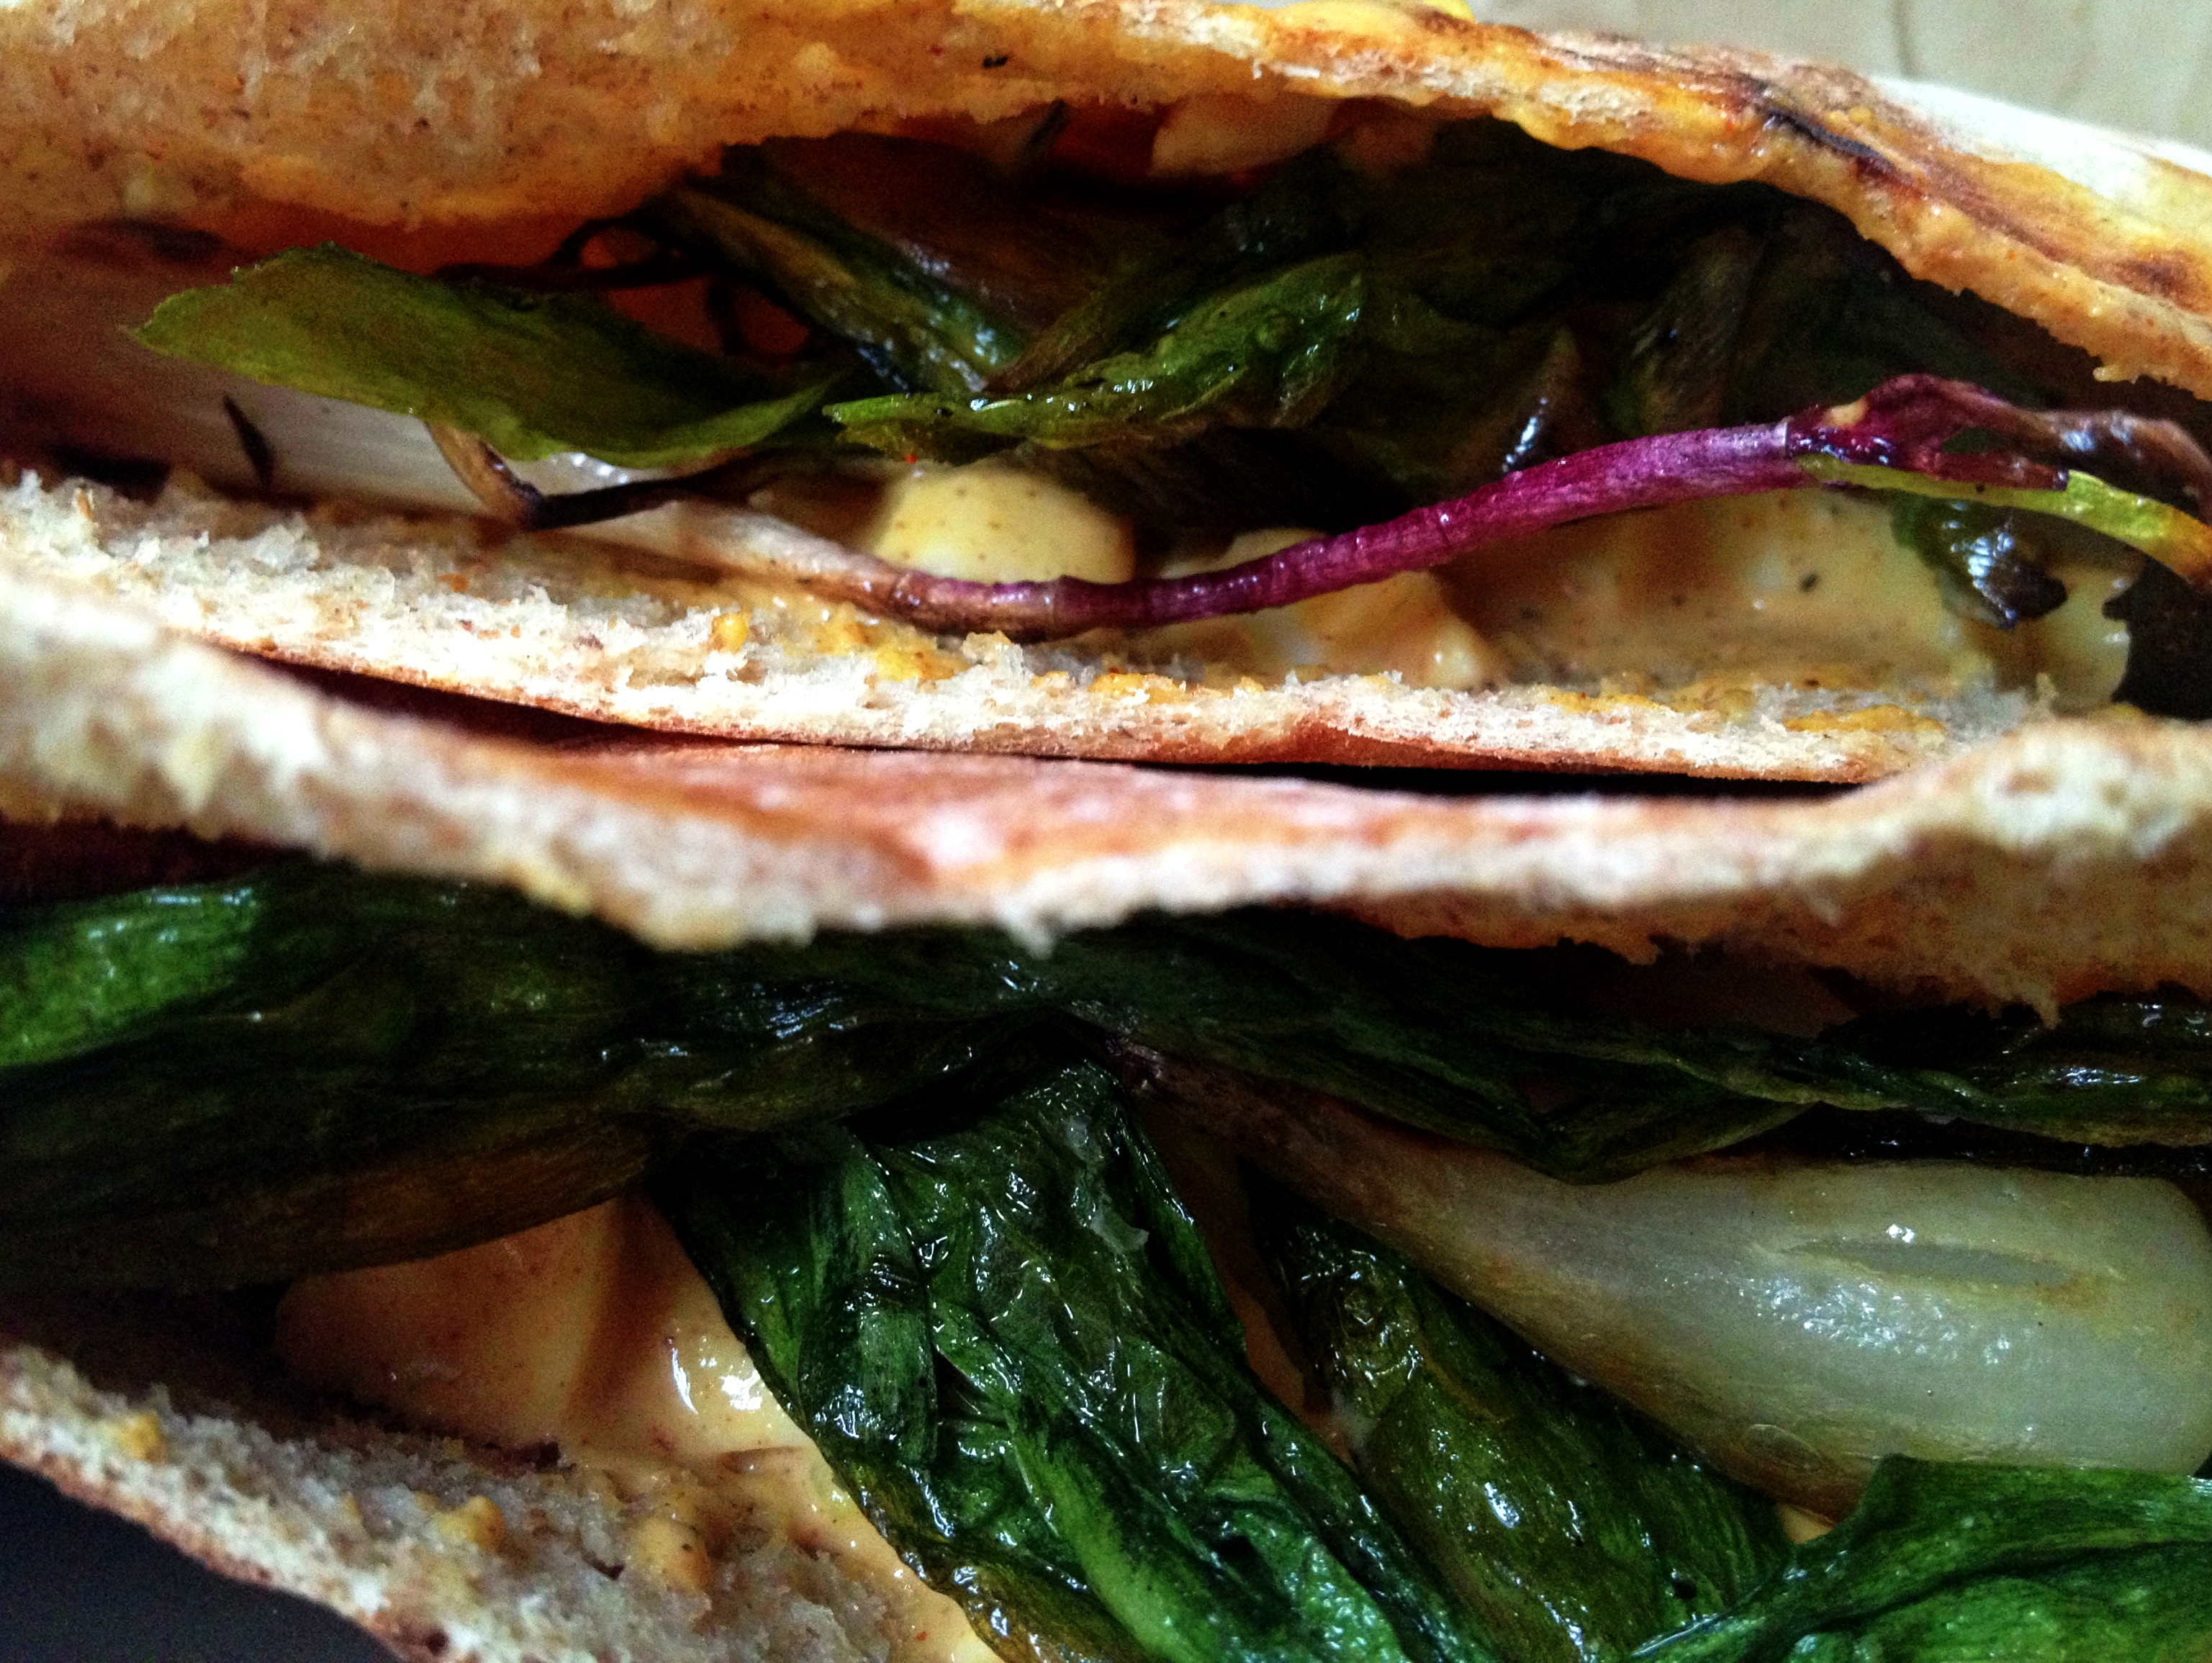
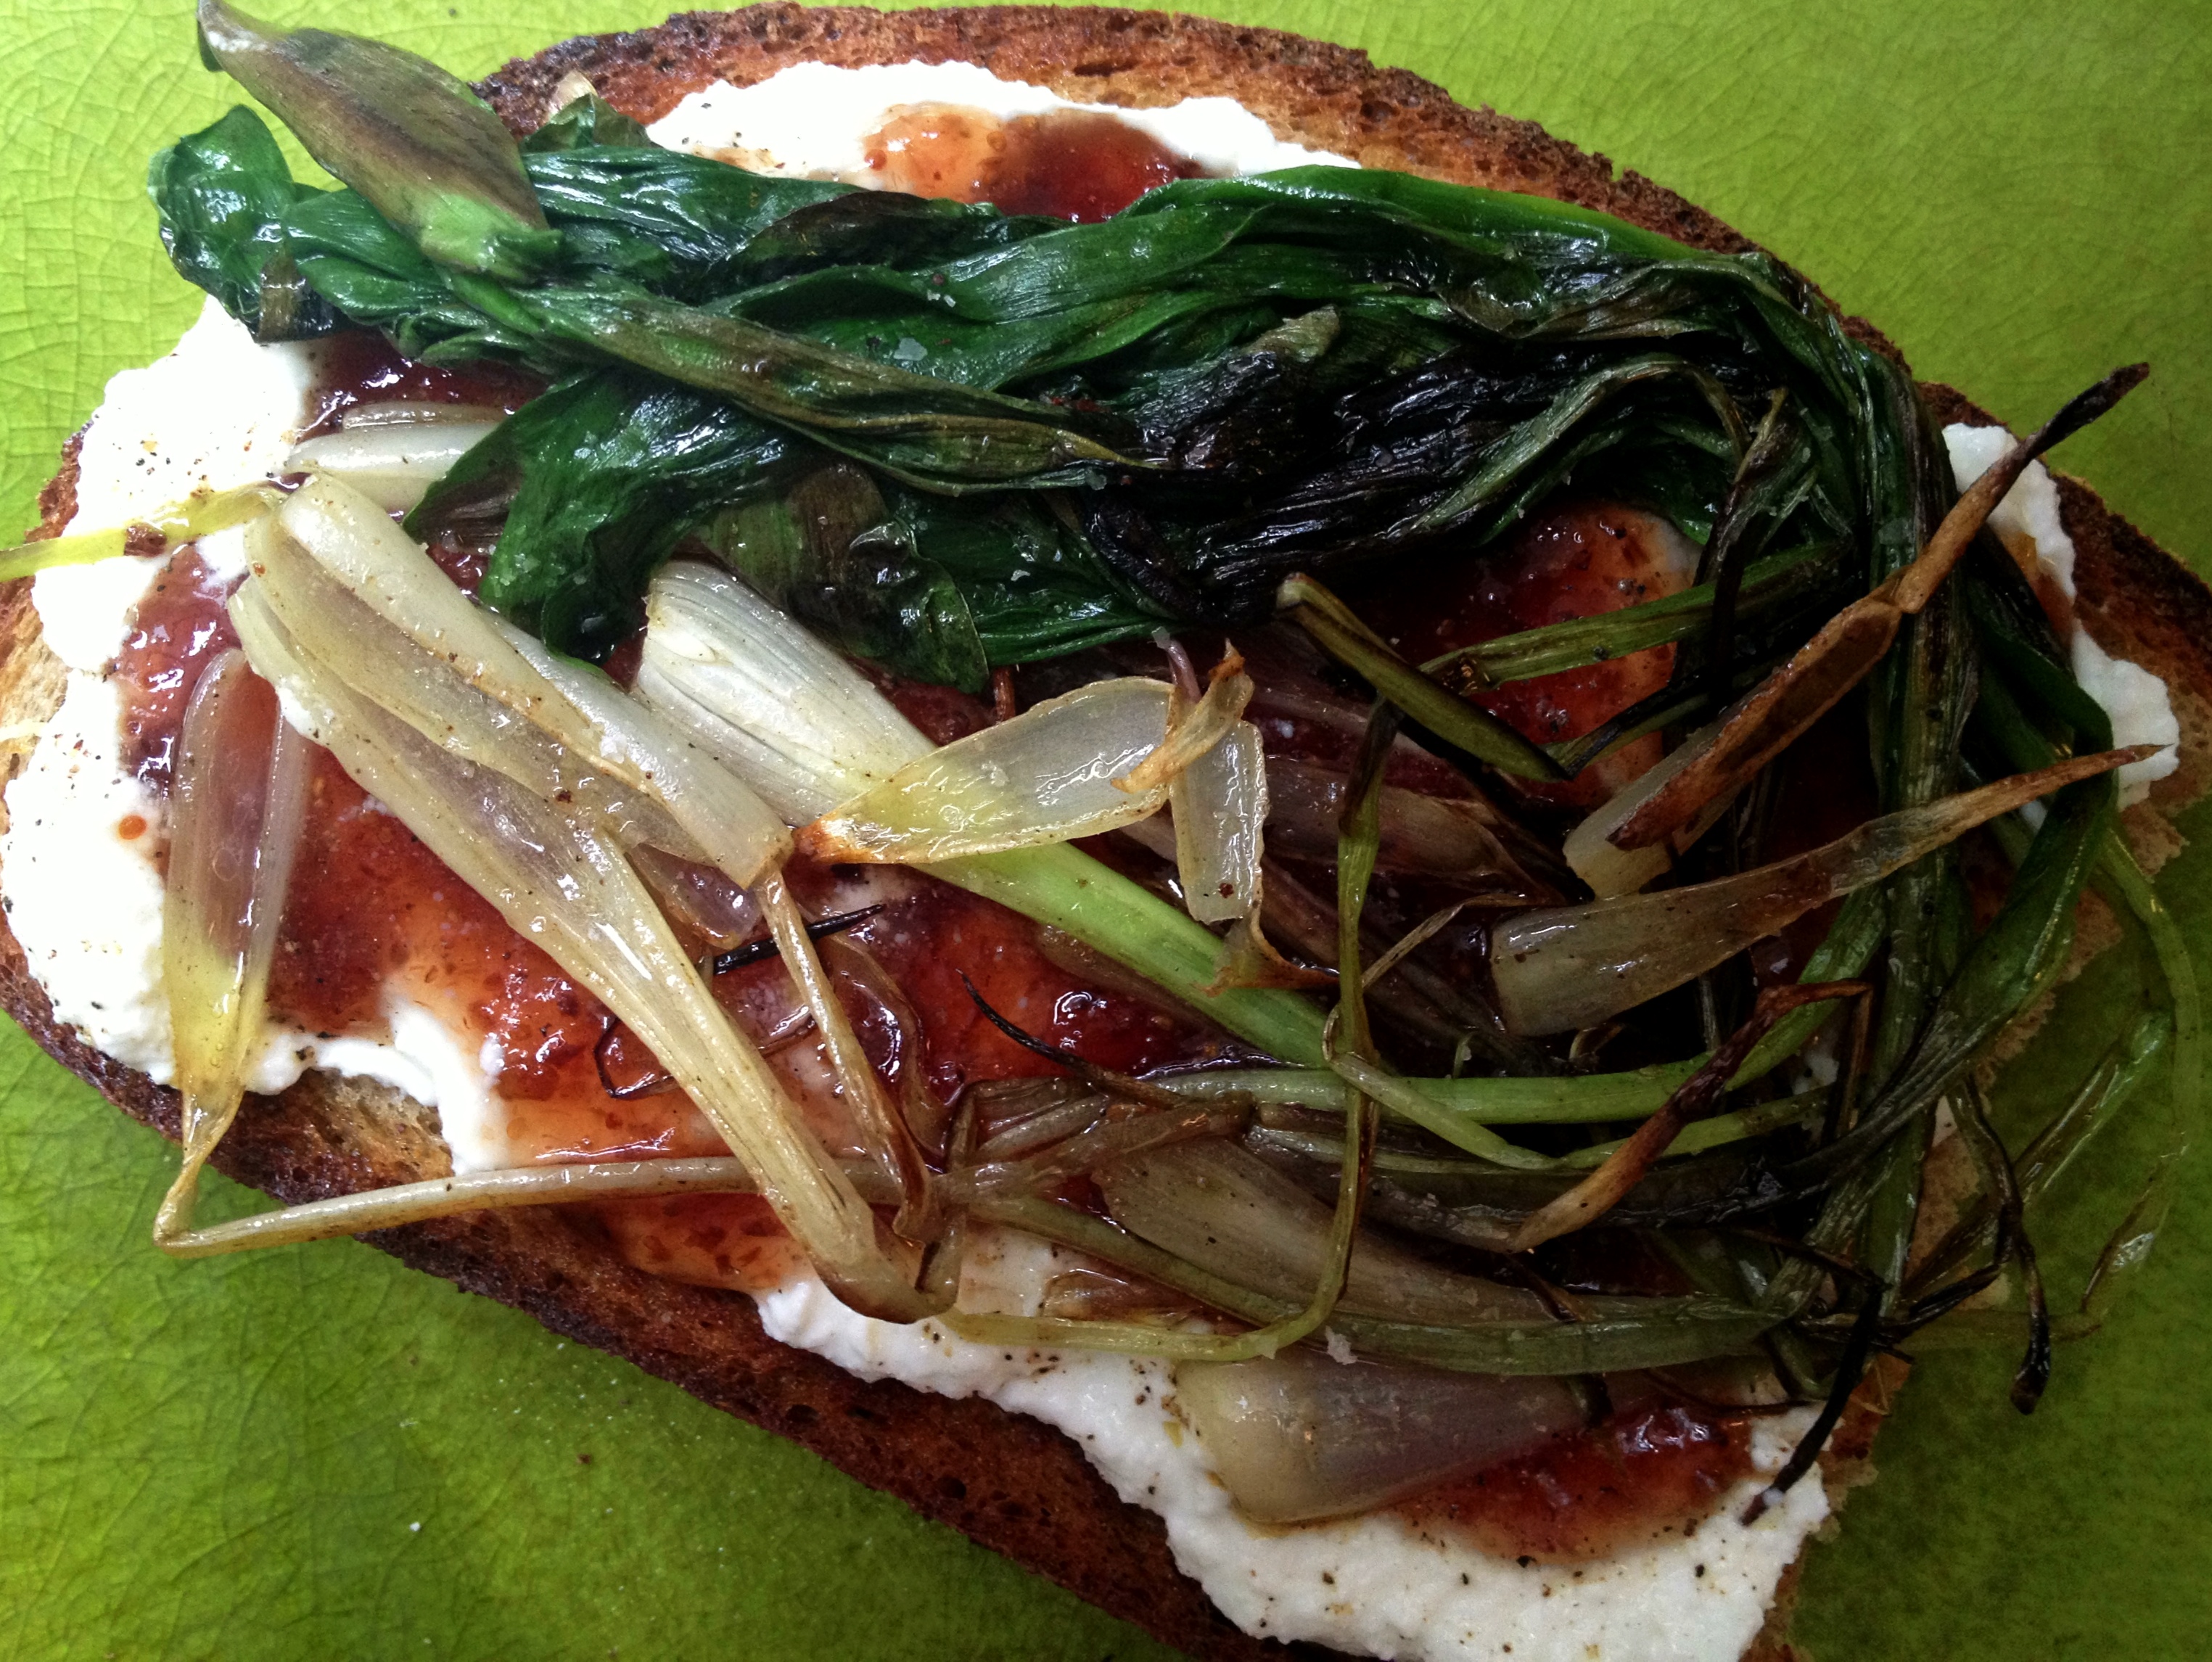
A CSA share can be a bit daunting when your household numbers just one. Despite having had folks over for dinner Friday and Saturday, I had yet to plow through last week’s vegetables by the time Tuesday’s pickup rolled around. Digging through my crisper this morning (after a completely unnecessary trip to my local farmers market), I came upon some Happy Rich (aka broccolini) that was looking a bit worse for the wear. The leaves were mostly yellowed and the buds had opened into delicate white flowers. But the stalks were green and crisp, so game on.

  1. Bring a tablespoon of olive oil up to medium heat in a small nonstick skillet and add a garlic scape sliced into long, thin slivers. (Regular garlic would also work, but ’tis the season of the scape.) Add a pinch of red pepper flakes.
  2. When the scapes are softened and just starting to brown, add a cup or two (one small bunch) of roughly chopped Happy Rich, starting with the stems, which will take longer to cook. Pour a little water in to help them steam. I recommend aiming for an al dente texture. Stir in the flowers and leaves along with salt and black pepper. Turn the temperature down to medium low.
  3. Crack two eggs into a cup and mix gently with half an ounce or so of shredded cheese. (I used a youngish aged gouda to great effect.)
  4. Pour the egg mixture into the pan and stir briefly to ensure even distribution. Sprinkle a little more cheese on top. When the bottom seems to be firm, pop it under the broiler for a couple minutes to set the top.

This was crazy good. Now on to the bok choy, kale, kohlrabi, and Swiss chard that are still in the crisper!

20130629-125306.jpg

How to Eat Cherries (in the Middle of a Heat Wave)

Summer is upon us. On Sunday I escaped from the sweltering city to the slightly less sweltering Hudson Valley. Despite a weekly influx of fresh fruit from my CSA,  I couldn’t resist stopping off at Fishkill Farms for a little pick your own action. The sun was so strong that the strawberries and I were reddening at an alarming rate.
Strawberry Picking

The cherry trees offered some welcome shade and some succulent fruit, though I could have used the help of someone a bit taller. Standing on my tippy toes, I managed to fill a couple of quarts–and also rain quite a few cherries down upon my head.

I left a mixed quart with my little sis in Poughkeepsie and polished off a good quantity on the winding late night drive home along the Taconic Parkway, the supermoon guiding my way. Somehow I managed to reserve enough cherries for one of my favorite recipes.

How to Eat Cherries (in the Middle of a Heat Wave) 

  1. Rinse your cherries and place them in a ceramic bowl in the refrigerator for at least a couple of hours.
  2. Pour yourself a nice glass of rosé  and strip down to your skivvies. (There is a variation on this recipe wherein you simply roll up your shirt, which is acceptable if not quite as delicious.)
  3. Grab the cherries and a juicy novel, crank the fan on high, and sprawl out in the middle of your bed.
  4. Place the chilled bowl of cherries on your stomach and commence to indulge.

If anyone has tips for getting cherry juice out of sundresses and sheets, I’m all ears!

Garden Pea and Spring Onion Purée

This week’s CSA share brought green onions, also known as spring onions. While one can just use them in place of regular onions, I wanted to take advantage of their delicate flavor and natural sweetness. Shelled peas at the farmers market provided inspiration.

Garden Pea and Spring Onion Puree

Garden Pea and Spring Onion Puree

  • 1 1/2 cups fresh shelled peas
  • 3 tablespoons coconut oil
  • 1/2 tablespoon Herbes de Provence
  • 2 spring onions, white parts diced and green parts reserved for future use (alongside radishes in a bulgur salad, for example)
  • 1 scape, thinly sliced
  • 1 teaspoon white wine vinegar or lemon juice
  • 6 mint leaves
  • salt and pepper
  1. Bring a small pot of well-salted water to a boil and add the peas. Simmer for two minutes or so and then rinse quickly under cold water to stop the cooking. The peas should be bright green and still firm.
  2. Saute the spring onions in 2 tablespoons of coconut oil over medium-low heat, taking care not to let them brown. (You could use some other light oil, but the coconut oil really brings out the sweetness of the onions and the peas.) When your onions are wilted, add the scape and cook for a couple of additional minutes. Then crush and sprinkle in the Herbes de Provence, allowing the oil to rehydrate the dried herbs.
  3. Toss the onion mixture, the remaining tablespoon of coconut oil, the vinegar, the mint and all but a tablespoon of the peas into the food processor. Gradually add water until the mixture is just loose enough to catch on the blades. (I’d guess that I ended up using about 1/3 cup.) Add salt and pepper to taste and continue processing until you have an even texture but not a true purée.
  4. Stir in the remaining peas, garnish with a sprig of mint and serve with toast points. (I went with whole wheat sourdough sliced thinly and toasted in a cast iron skillet with a little coconut oil.)

I am happy to report that this pairs nicely with a semi-dry Riesling, gin and tonics with rhubarb simple syrup and a dash of orange bitters, or your morning coffee.

Rhubarb Gin and Tonic

Last Night’s Bulgur-Kale Pilaf

Yesterday was the longest day of the year–and a glorious one at that. A classmate, neighbor and new friend joined me for a wine-soaked celebration of the season’s bounty. Turns out we have even more in common than expected. This includes an inability to pass up a farmers market. Between our mutual addiction and our individual CSA shares, we had quite a few vegetables on hand. We also had some lovely pork chops thanks to Lewis Waite Farm.

Several glasses of wine and a couple of hours of gossip later, we sat down to a bulgur-kale pilaf with garlic scapes, green onions and parsley; coriander, cumin and fennel-crusted pork chops; and a green salad with celery, carrots, turnips and a goat milk yogurt vinaigrette.

Summer Solstice Dinner

We rounded the night out with a little rum and some armchair astrology circa 1980.

Sex SignsThis morning found me downing a cup of coffee before dashing out to run errands. A friend was in the area with her dog, which led to more coffee (iced this time) and a little too much sun. Naturally, I had to swing by the Grand Army Plaza Greenmarket for yet more vegetables. By the time I arrived home, it was after 1:00 and I was in serious need of some food to cushion all of that caffeine.

Luckily, in my tipsy state, I had still managed to pack up the leftover bulgur-kale pilaf. (Even better, Sara had done ALL of the dishes.) I replicated last night’s vinaigrette, using two tablespoons of goat milk yogurt, one tablespoon of white wine vinegar, one tablespoon of olive oil, a pinch of salt and some freshly-ground black pepper. I tossed this in a bowl with some green leaf lettuce, the leftover pilaf and an ounce or so of crumbled feta. You could do the same with leftover rice, quinoa, or pretty much any grain and whatever vegetables you have on hand. This makes an ideal light summer lunch that you can whip together in minutes.Bulgur-Kale Pilaf

Happy Rich, Seitan and Skiitake Stir-Fry

This is a big week. CSA season started and the teenage vegan is making her annual pilgrimage to New York. Rather than camp out on an air bed in my living room, my baby sister will be interning with the Powerhouse Theater for six weeks and, much to my delight, bunking in my old dorm. She was scheduled to fly into LaGuardia at 3:00 this afternoon. It is now after 8:00pm and her flight to White Plains (yes, White Plains) has yet to depart. This is Eliana and the plane that may or may not bring her to New York tonight. 

Eliana and the Plane

I had planned a lovely vegan dinner for two. Alas, it looks like I will be dining alone.

Happy Rich, Seitan and Shiitake Stir-Fry

  • 1/4 cup dried shiitake mushrooms
  • 1 tablespoon corn, canola or peanut oil
  • 1 tablespoon chili oil
  • 1 tablespoon minced garlic (3-4 small cloves)
  • 1/2 tablespoon minced ginger
  • 15 or so sichuan peppercorns
  • 1 small onion, halved and cute pole to pole
  • 1 small bunch Happy Rich (shoutout to Windflower Farm and Prospect Park CSA!), broccolini, Chinese broccoli or other sturdy greenery, chopped
  • 8 ounces seitan (which, incidentally, freezes brilliantly)
  • 1/2 tablespoon concentrated vegetable stock (If you have remembered to replace the tamari you used up last week, you could probably use that instead.)
  • 2 tablespoons rice wine vinegar
  • 1/2 tablespoon sesame oil
  • parsley (optional)
  • 1 cup brown Jasmine rice or whatever else tickles your fancy, cooked
  1. Boil a little water, pour it over the shiitakes and let stand while you get your rice going.
  2. Bring a wok or large heavy-bottomed skillet up to medium-low temperature with the vegetable oil, chili oil, garlic, ginger and sichuan peppercorns. (I might recommend crushing the peppercorns up a bit, which I did not.) Once your pan starts sizzling and from then on, be sure to stir almost continuously. Cook for a couple of minutes until the oil is infused, add the onion, crank up the heat to medium high, and stir-fry until the onion starts to brown around the edges. Add the Happy Rich and cook until just starting to go limp. Toss in the seitan.
  3. Add the vegetable stock or tamari, rice wine vinegar and the shiitakes with their liquid. Cook, stirring constantly, for a minute or two until the liquid has boiled off.
  4. Remove from the heat and stir in the sesame oil and some fresh flat-leaf parsley if you happen to have some languishing in the fridge.

Happy Rich, Seitan and Shiitake Stir-Fry

Polish off half of this with the remainder of the surprisingly full-bodied Pinot Gris you’ve been nursing all week. Pack the rest in a recycled takeout container to present to the teenage vegan–if and when she arrives.

Ode to the Hard-Boiled Egg

When my baby brother was born in 1981, a family friend gifted me with Betty Crocker’s Cookbook for Kids. My mom recently shipped my tattered copy to me along with some cookbooks I needed for a research paper. I used to read it obsessively–particularly the recipes for eggs in bologna cups and a ghost cake with flaming eyes. But the only thing I can recall actually making is hard-boiled eggs. (My family’s diet skewed more toward lentil burgers and fruit juice-sweetened carrot cake.) To this day, I loosely follow the hard-boiled egg technique set forth in this book.

Betty Crocker Cookbook for Kids

Perfect Hard-Boiled Eggs (Adapted from Betty Crocker’s Cookbook for Boys & Girls)

  1. While waiting for your morning coffee to brew, place your eggs into a pot, cover with water by at least one inch, and set over a burner turned to high. 
  2. Allow eggs to boil for one minute – or until you begin to wonder what that rattling sound is. Remove the pot from the heat, add a lid, and let stand until you have finished your coffee (about 10 minutes).
  3. Drain and add ice water to bring the temperature down quickly, which will ward off the dreaded grayish green ring that sometimes forms on the outside of the yolk. (Betty Crocker claims that this also makes them easier to peel, but I’m not convinced. The only thing that seems to make a difference in my experience is to use old eggs. If I am planning deviled eggs, I will try to remember to buy the eggs a few weeks in advance and leave them in the back of the fridge.) 

Quick, portable snacks that are rich in protein can be hard to come by. Sometimes, when I tire of raw almonds and spoonfuls of peanut butter, I make a big batch of hard-boiled eggs and snack on them throughout the week. They’re also great to have on hand for a quick weeknight salad.

Today I find myself unexpectedly working from home while recovering from an asthmatic condition brought on by tortellini fumes. (Don’t ask.) The weather is miserable, so I had resigned myself to making do with what food I had on hand. Egg salad is one of my comfort food fallbacks. Eggs will keep in the refrigerator pretty much forever and can be doctored up with whatever condiments and spices you have in your arsenal. Below was today’s working-from-home lunch. Consider it a jumping off point rather than a recipe.

 Spanish-Style Egg Salad Sandwich with Frizzled Ramps

  1. Pour half a tablespoon of olive oil into a cast iron skillet over medium-low heat and add four ramps. (Scallions would work just fine here. Either way, see my tips for grilling ramps. And don’t worry if the green portions are dried out; these will add a nice crunchy counterpoint to your egg salad.) 
  2. Combine 2/3 of a tablespoon of mayonaise, 2/3 of a tablespoon of very sharp mustard (though a basic Dijon will also suffice), a splash of sherry vinegar, 1/2 teaspoon of hot Spanish paprika, a tiny pinch of sugar, and salt and pepper to taste. Then stir in two diced hard-boiled eggs.
  3. When the ramps are nicely colored, slice a whole wheat pita in half and toast it right in your skillet.
  4. Assemble and enjoy, taking care not to drip onto your keyboard.

Egg Salad Sandwich

Ramp, Fig and Ricotta Tartine

My first year of graduate school concluded twelve days ago. I’ve read a novel, gotten a pedicure, and made my annual pilgrimage down to Baltimore for Beth and Don’s Memorial Day BBQ. This is me with the chipotle, espresso, and bourbon barbecue sauce that I used to glaze a 14.5-pound brisket.

Jasmine on the Grill

Life is beginning to return to normal, though I am a bit mystified by what everyone does in the hours between working and sleeping. The stress of holding down a full-time job while cranking out research papers seems to have transformed me into a (reluctant) morning person. I have been trying to make the most of this found time, particularly on Saturdays when the greenmarket near my house is open.

It turns out that the early bird gets the ramps. For those who are not familiar, ramps are an early spring vegetable much beloved by market-driven chefs, locavores, and those who like to fancy themselves in the know. (For an interesting summary of the arc of the ramp, check out Hugh Merwin’s recent Grub Street post.) Ramps taste like a cross between a leek and green garlic and make for a lovely pesto. But I like them best grilled whole.

Ramp, Fig and Ricotta Tartine

  1. Cut a thick wedge of rustic bread (whole wheat sourdough from Bread Alone in this case) and set it to toasting.
  2. Bring a cast iron pan up to medium low heat with a tablespoon of olive oil.
  3. Rinse your ramps and trim the very tip, then set them in the cast iron pan, leaving the greens hanging over the edge. (This technique is key in my opinion, as it allows you to get a nice sear on the white portion of the ramp without overcooking the delicate greens.)Ramps
  4. Once you have some nice color on one side and the ramps are starting to soften, use the greens as a handle to flip them over and sear the other side. Then shift them fully into the pan and briefly cook the greens.Grilled Ramps
  5. Spread a thick layer of ricotta cheese onto your toast, add a thin layer of fig preserves, place your grilled ramps on top and finish with a little salt and freshly ground pepper. Enjoy.

Ramp, Fig and Ricotta Tartine