Pickled ‘n Deviled

Saturday night Sarah hosted the third annual Holiday Oyster Extravaganza, in which we prepare and consume 100 oysters (along with a liberal dose of booze). Shucking 100 oysters is no easy feat, but Mark once again rose to the occasion. As usual, I was in charge of the oyster accoutrement. This year’s raw oysters got a toasted fennel mignonette and a beet and horseradish relish.

Raw Oysters with Fixin's

The roasted version featured a fennel-saffron cream.Roasted Oysters with Fennel-Saffron Cream

The Blue Points were delicious, but I’m here to talk eggs. Much as I love eggs in all their forms, I’ve had trouble keeping up with the share I get from my CSA, so I had resolved to prepare deviled eggs for Saturday’s party.

On Thursday night I wrapped up my third semester in NYU’s Food Studies program and went out with friends to toast a month of pleasure reading. I got home late and tipsy, but determined to get a head start on prepping for the party. Rooting through the fridge for a snack while my eggs cooked, I stumbled on some beets that were looking a little worse for the wear. This got me thinking.

A few years back a friend and I spent a weekend checking out Pennsylvania’s Amish Country. We had occasion to dine at a smorgasbord, where I stumbled on the delight that is a beet-pickled boiled egg. As previously confessed, I am a sucker for a hard-boiled egg. Throw in tangy flavor and an outlandish pink hue and I am putty in your hands.

Beet-Pickled Deviled Eggs 

  • 2 large beets
  • 1 tablespoon olive oil
  • 1 dozen eggs
  • 2 cups apple cider vinegar (Bragg if you can get it)
  • 3-4 tablespoons assorted pickling spices (I used black and red peppercorns, coriander, fennel, allspice, torn bay leaves, and probably something else I’m not thinking of at the moment.)
  • 1 teaspoon salt
  • 1/4 cup sugar
  • 1/2 cup mayonnaise
  • 1 tablespoon Dijon mustard
  • 1 tablespoon dried mustard powder
  • salt, pepper and whatever your taste buds tell you to add
  • 2 scallions, greens thinly sliced and white portion reserved for another use
  1. Pre-heat the oven to 400. Rinse the beets, toss them with the olive oil in a small pan and stick in the oven. Cook until tender (about 45 minutes).
  2. Boil the eggs using your own technique or according to my interpretation of Betty Crocker’s failsafe recipe.
  3. Once the beets are cool enough to handle, peel and slice them. Add these to a large jar or a bowl along with the vinegar, salt, sugar and spices.
  4. Peel the eggs and add them to your brine, taking care not to splash the fuchsia liquid all over your white tank top.Eggs Pickling
  5. Place a lid or some plastic wrap over the top and pop it in the refrigerator. Let these sit for 12 to 24 hours, stirring at least once to make sure they take the color evenly. I left mine in the brine until I got home from my office holiday party the following night and this is what they looked like.Pickled Eggs
  6. Fish the eggs out, pop them in the fridge to dry, and snack on the pickled beets. Still not a good time for a white tank top.
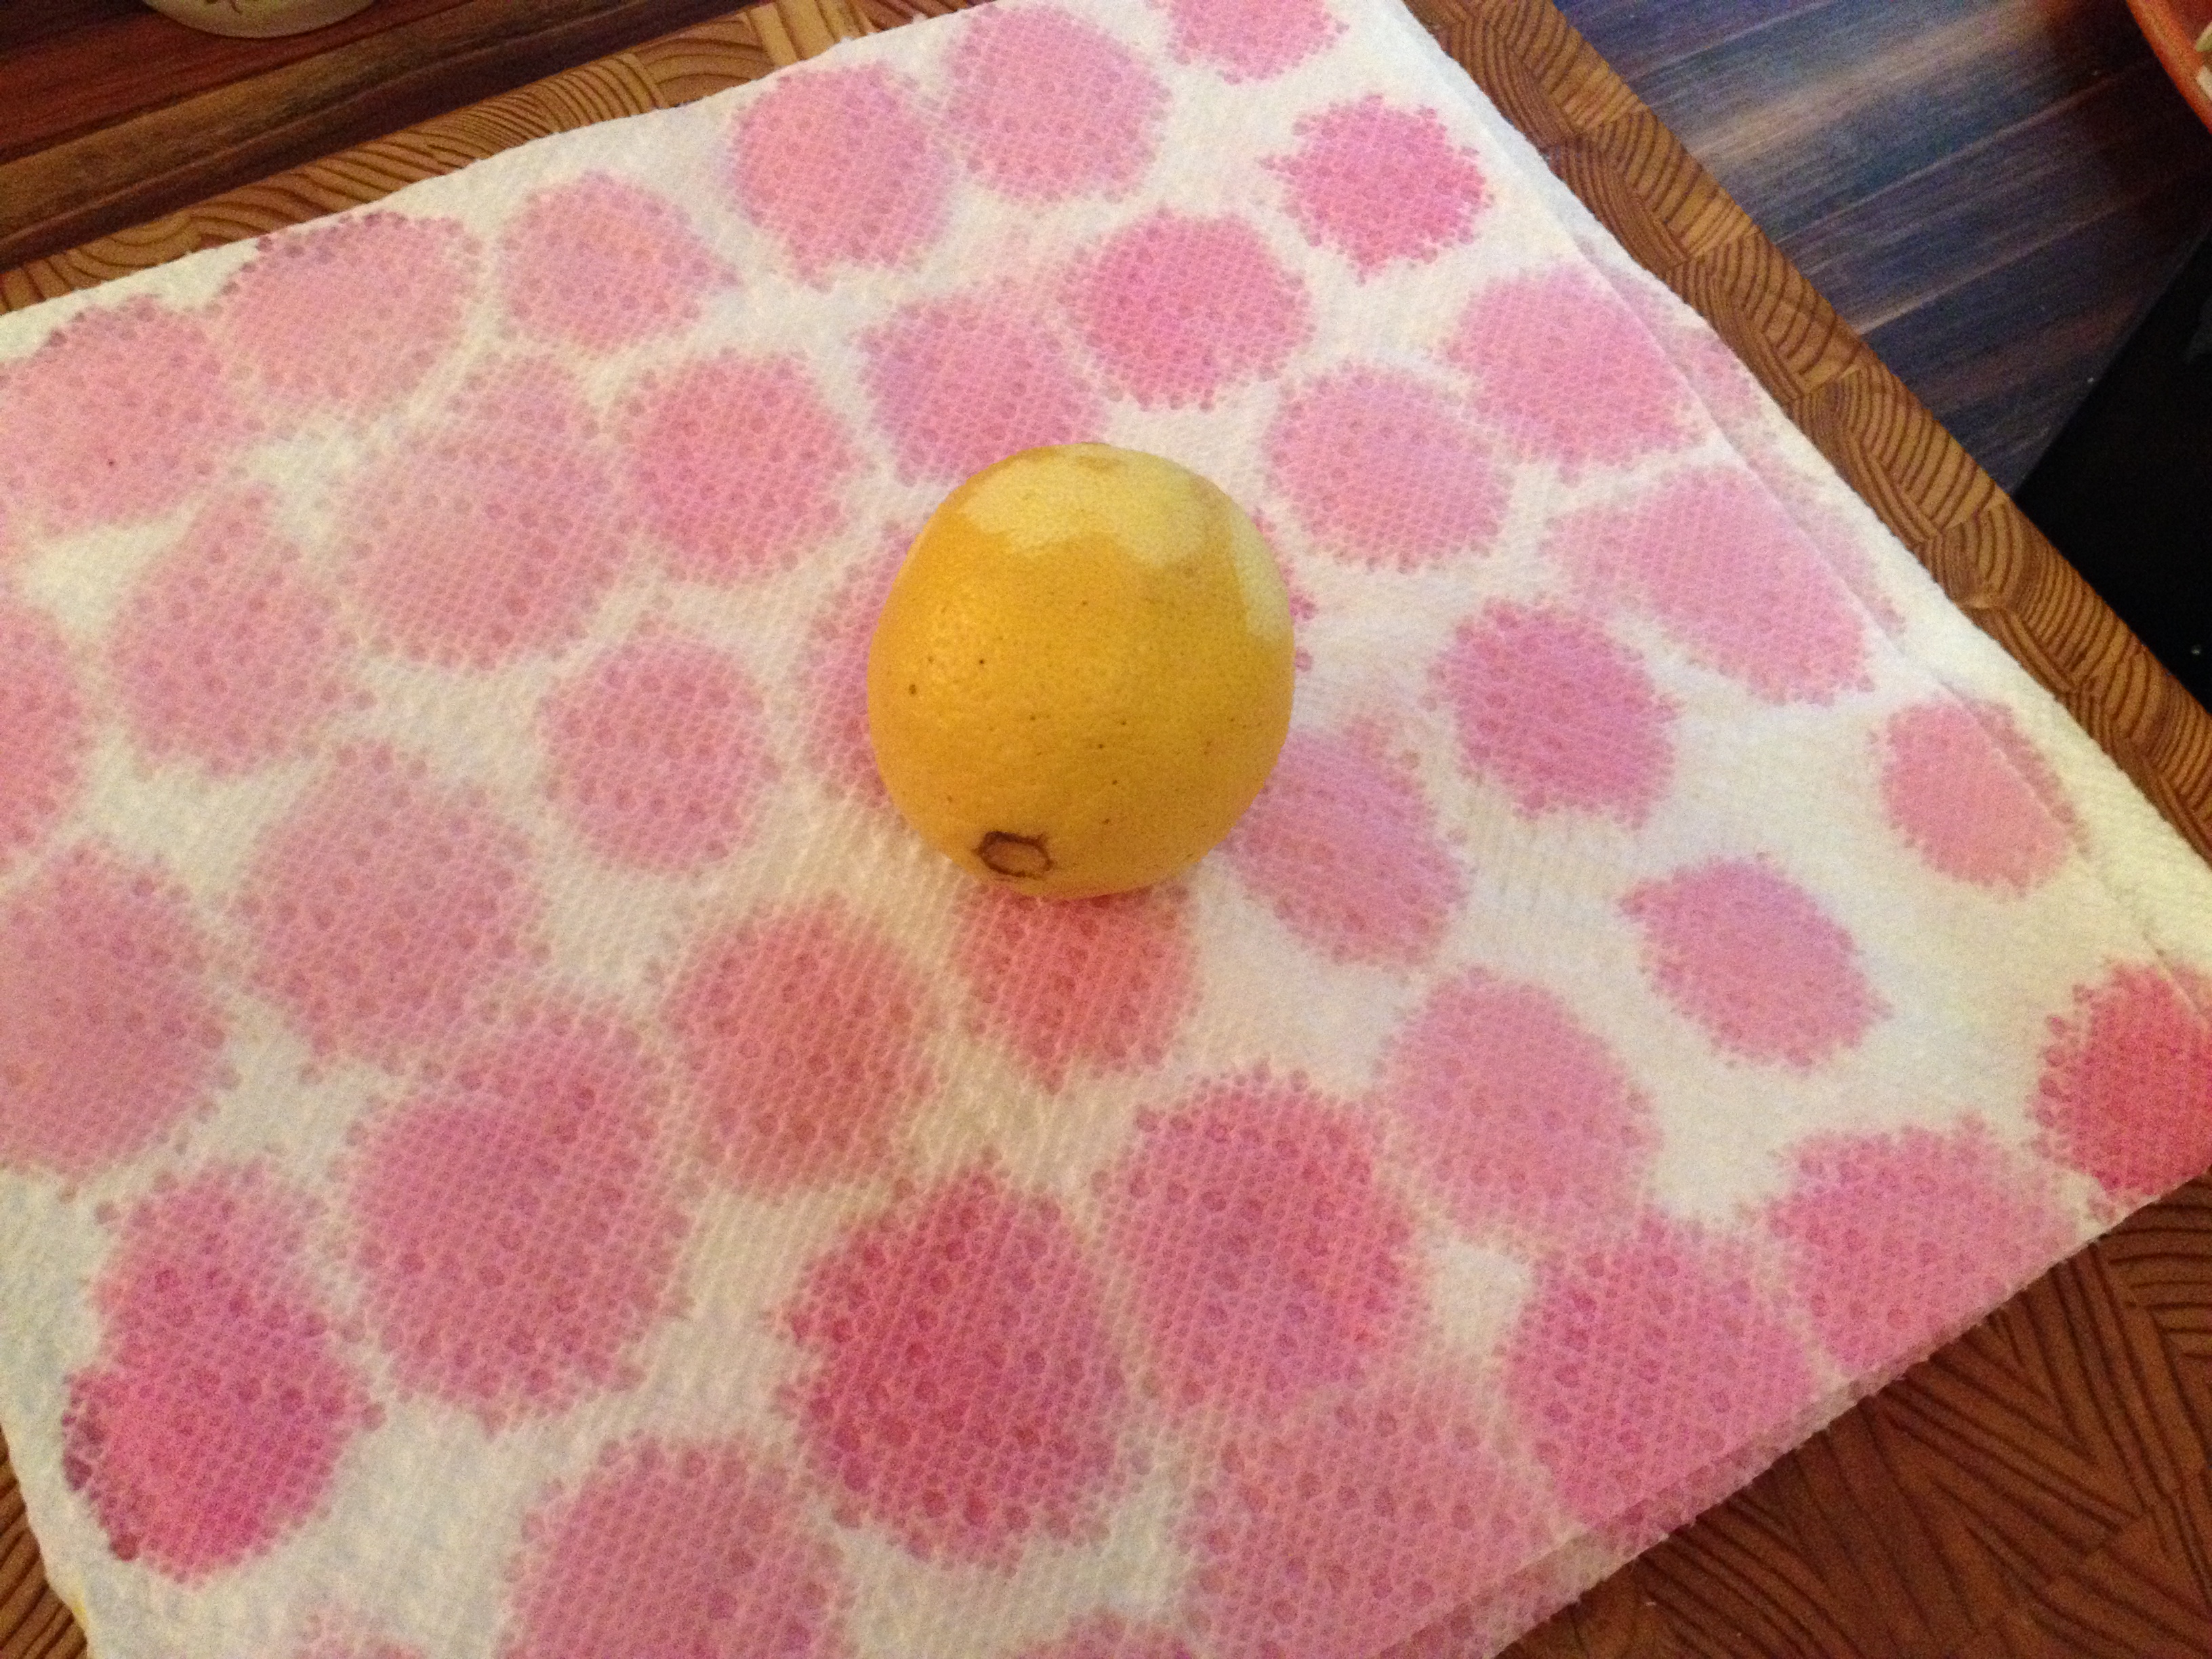
  7. Carefully slice your eggs in half lengthwise and pop the yolks into a bowl. If you’ve left them in for the full 24 hours, the yolks will be quite a sight, as will the paper towel where you set the halved eggs.Sunset Egg YolksBeet Stains and a Lemon
  8. Using a fork, mash the yolks roughly with the mayonnaise, mustard, mustard powder, salt, plenty of freshly-ground pepper and anything else that strikes your fancy. Press the mixture through a sieve for a refined, creamy filling. Or don’t. Taste the mixture and tweak as you see fit. I added a pinch of sugar and probably some other stuff I can’t recall.
  9. Let the filling chill until just before you are ready to serve. Spoon it into a freezer-worthy plastic bag, snip the corner and pipe the filling directly into the egg (not so) whites. Or just glob it in with a spoon.
  10. Garnish with the scallion greens because none of the crappy stores you went to had chives and a little green makes the eggs look more like food and less like some sort of alien life form.

Beet-Pickled Deviled Eggs
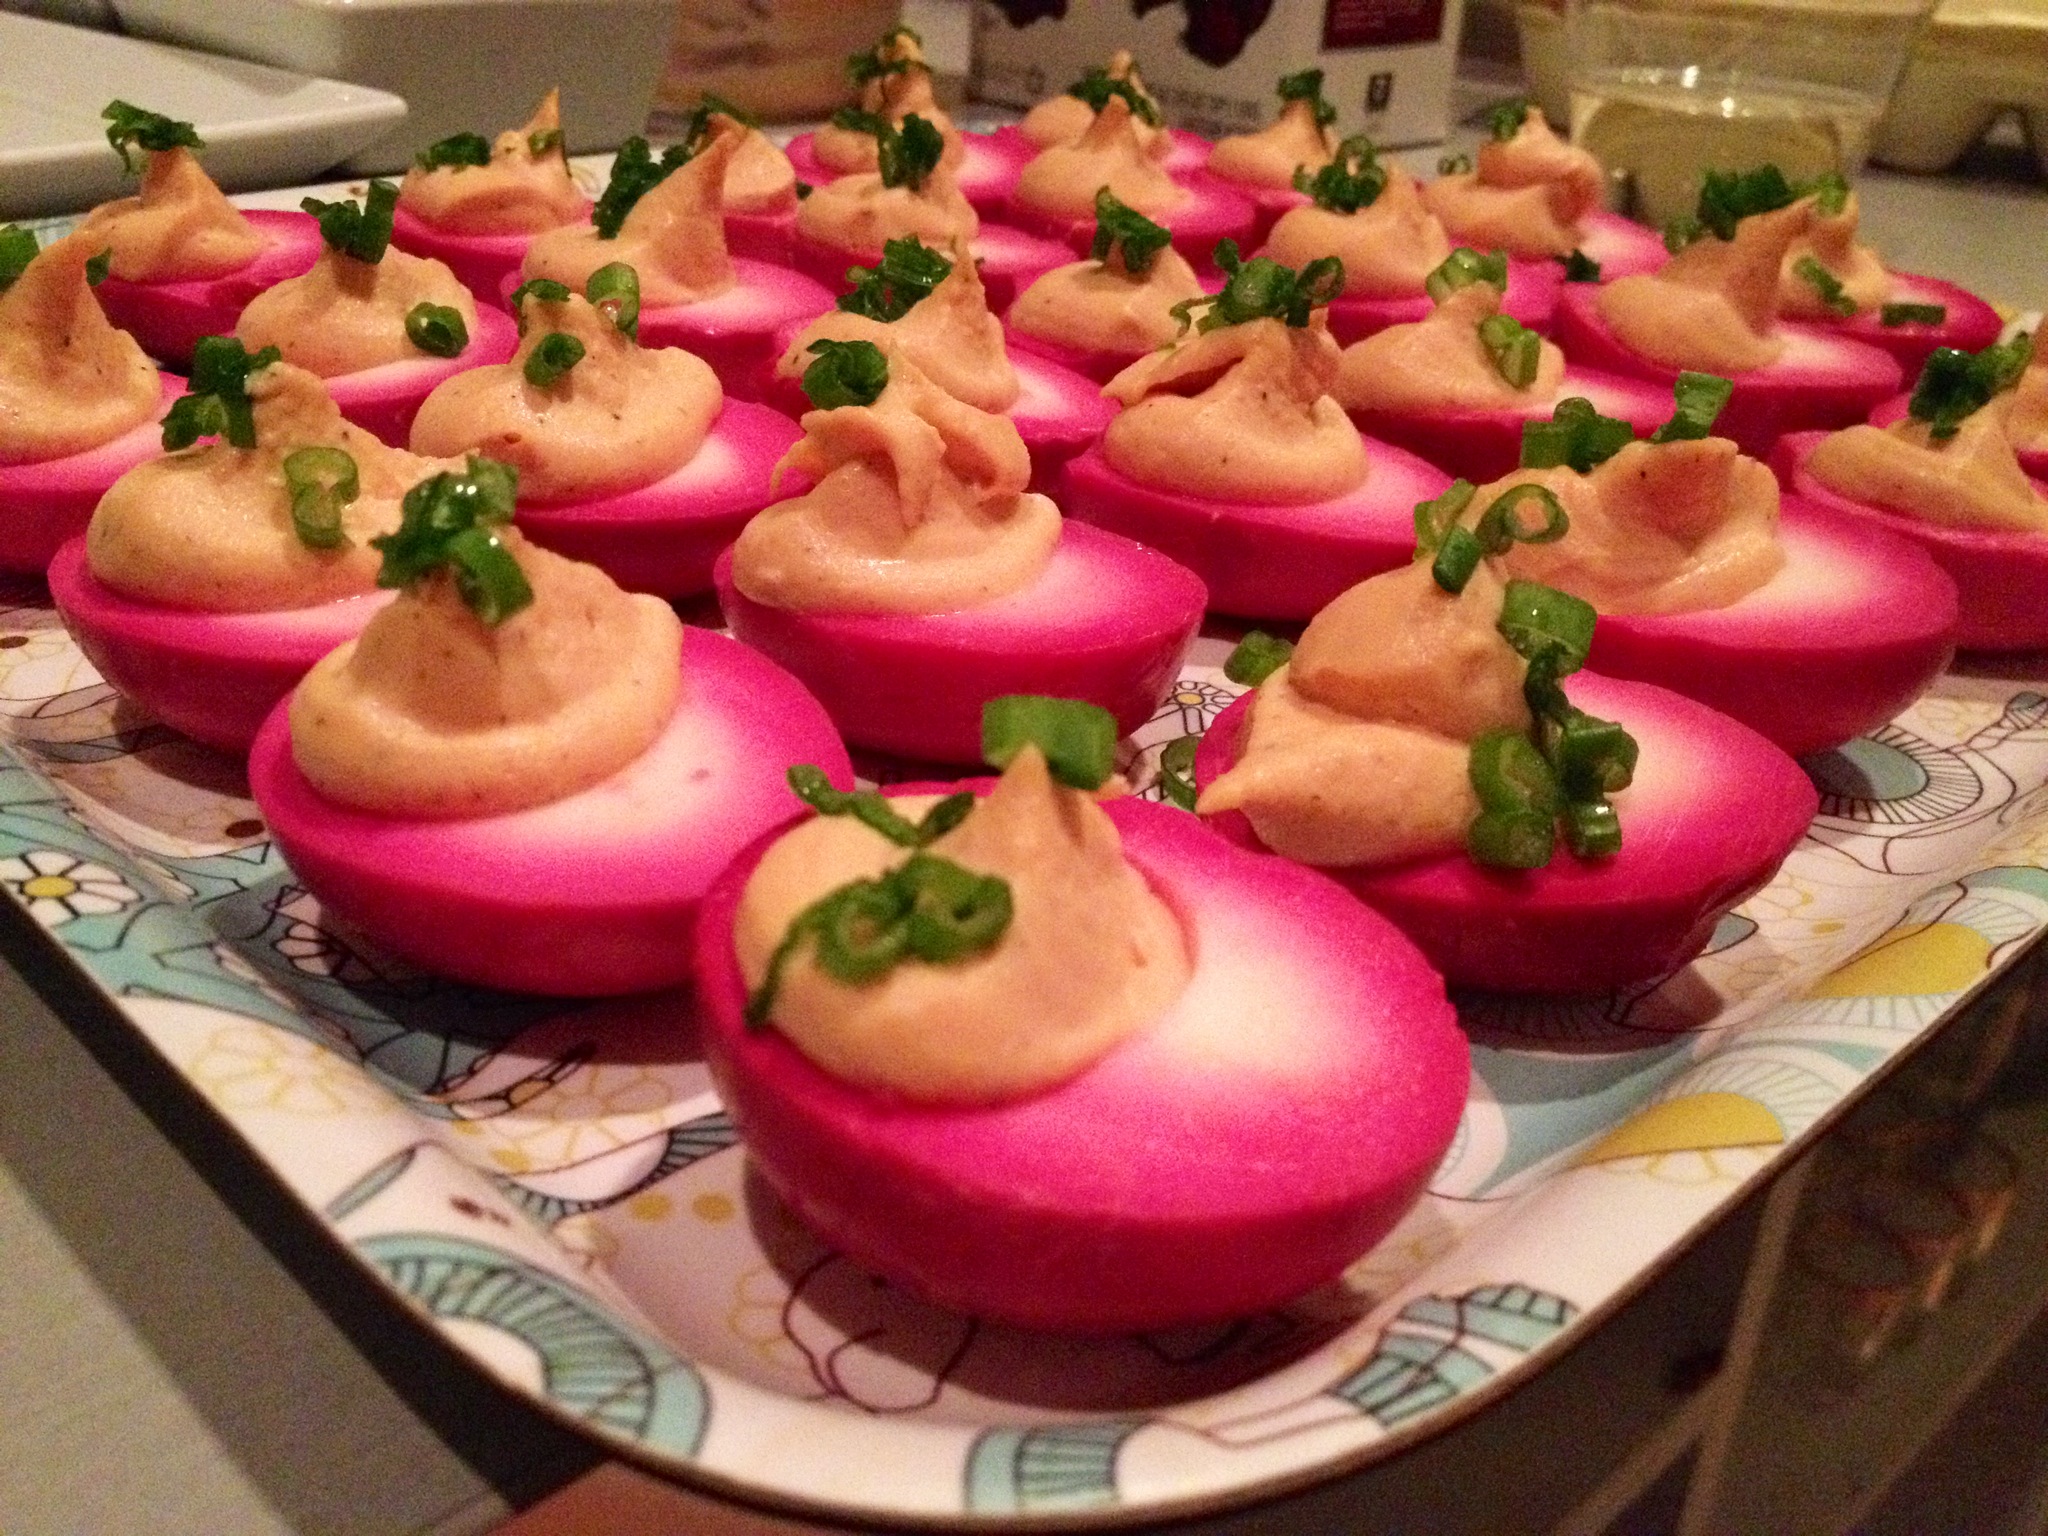
The eggs were a smashing success, as was the party. The guests laughed. The Christmas tree twinkled. The yule log crackled on the flat-screen television. At some point in the night, Prosecco and oysters gave way to rum and hunks of leftover cheese. Eventually, I was forced to brave the elements. A daylong snowfall had turned into freezing rain. The streets were slushy and abandoned.

Mouse HatMy newly acquired hat and I got home a little before 3:00am. I had a devilishly good time at this year’s Oyster Holiday Party, but will confess to feeling a bit pickled come Sunday morning.

Homemade Hummus

As previously reported, I spent six months studying in Jerusalem while in college. This was back in my vegetarian days, and Israel is a great place to be a vegetarian. While the majority of the Jewish population is secular, kosher tradition holds, meaning that most restaurants are either meat or dairy. On top of that, Middle Eastern food embraces legumes and vegetables.

Being the child of hippies, I’d already consumed a lifetime worth of chickpeas. But the hummus in Israel was a revelation–creamy, rich and flavorful–and I indulged with abandon. This came with a price; back in the States, I couldn’t bring myself to eat the lazily mashed canned chickpeas that my college cafeteria tried to pass off as hummus. Even in New York City, where I eventually settled, truly delicious hummus proved elusive.

At some point, hummus started popping up in Korean delis and the fancier cheese sections of grocery stores. I tested them all. Some were as bad as the salad bar glop of my coed days. Some were serviceable. But none were inspirational and, after a tub or two, I always reverted to making my own.

About ten years ago, by sheer accident, I found it: hummus like I remembered. It was a tiny shop just south of Washington Square Park and up half a flight of stairs. A couple of weeks later, over drinks, I announced to my buddy Alex that I had discovered Jerusalem-quality hummus right in the middle of Greenwich Village. Alex interrupted me to announce that he had, in fact, recently found the best hummus in New York City in the East Village. Already a couple of drinks into the evening, we proceeded to argue for the superiority of our individual hummus spots for what must have seemed an eternity to the people seated around us.

It turns out that we were arguing over the same hummus. Ori Apple, an Israeli who bemoaned the lack of good hummus in New York City, had opened the first two locations of Hummus Place just months apart. I am happy to report that, since then, a number of good hummus restaurants have opened around the city.

But I still enjoy making my own. While I don’t really have a fixed recipe, I have learned a few things over the past 20 years. First, and this is truly important, don’t use canned chickpeas. The texture and flavor will be off. Trust. Second, use good quality tahini. (I suspect that this may be the secret to Hummus Place’s magical concoction.) Third, use plenty of liquid. Finally, let the food processor run for longer than you think reasonable.

Here’s what I whipped up this afternoon, but feel free to make it your own. So long as you cook the chickpeas enough, it’s honestly hard to screw up hummus. Just keep tasting and tweaking.

Chickpeas

Jasmine’s Hummus

  • 1 pound dried chickpeas (or, if you are a sensible person, half that)
  • 6 cloves garlic
  • 3/4 cup tahini
  • pinch red pepper flakes
  • 1 bunch curly parsley
  • 1 teaspoon sweet paprika
  • 1 teaspoon hot paprika
  • juice of 1 lemon (or a tablespoon or so of white wine vinegar in a pinch)
  • salt and black pepper
  • 1 tablespoon sumac (optional)
  1. Before going to bed, dump the chickpeas into a bowl and add enough water to come at least a few inches above the beans. (You could look them over for rocks or odd-looking beans, but it’s late. You’re sure to spot anything amiss tomorrow when you are better rested.)
  2. In the morning–or whenever you are good and ready for a little procrastination–drain and rinse the beans. Add them to a large pot, top with plenty of water, toss in the peeled garlic and the red pepper flakes. Bring to a boil and then reduce to a simmer. Let this go for an hour or so while you get back to whatever duties you have been shirking.
  3. Test the chickpeas. If they are tender, add a tablespoon or so of salt and then let them simmer for another 15 minutes. The water should taste fairly salty.
  4. Realize that you are in danger of making a truly obscene amount of hummus. Scoop half of the chickpeas and some of the liquid out. Refrigerate or freeze for future use (in a soup, stir-fry, curry, etc.).
  5. Dump the cooked garlic and the remaining chickpeas into your food processor, making sure to reserve the cooking liquid. Add the tahini, sweet and hot paprika, lemon juice, sumac (if you have some), plenty of black pepper, and whatever else your heart desires. Pour about half a cup of the cooking liquid in and process away. Let it run for five minutes or so, adding more liquid as needed to achieve a loose but not soupy consistency. Taste and adjust seasoning as desired.

I ate this for dinner tonight, topped with a tangle of roasted broccoli rabe. Good stuff.

Hummus and Broccoli Rabe

Classic Bruschetta

As those who know me well know well, I rarely cook the same thing twice. I am constantly exploring and experimenting. I credit my parents for allowing me to do my own thing in the kitchen at a very early age. (Somewhere there is a photo of a four-year-old me standing naked on a chair preparing scrambled eggs.)

But this weekend I was reminded that classic dishes became classics for a reason.

After a stroll through Prospect Park (air cast be damned), I swung through the Grand Army Plaza Greenmarket where, despite the CSA bounty overflowing my refrigerator, I couldn’t resist picking up Italian eggplant, basil, and Bread Alone‘s insanely delicious whole wheat sourdough. On my stroll home, I devised a plan to toast the bread, slather it in ricotta cheese, and top it with basil, fresh peaches, black pepper, and perhaps a drizzle of honey. While I have no doubt that this dish would be delicious, the thick mold on top of my ricotta forced me to make other plans.

(Fairly) Classic Bruschetta

  • 2 slices whole wheat sourdough or other good quality bread of your choosing
  • 1 tablespoon olive oil
  • 1 clove garlic, thinly sliced
  • 1 medium tomato, chopped and sprinkled with salt
  • 10 basil leaves, thinly sliced
  • salt and pepper
  • 1 teaspoon red wine vinegar (optional)
  1. Bring half a tablespoon of olive oil up to medium heat in a cast iron skillet. Add the garlic and cook stirring constantly until just tender but not yet browned. Remove garlic to cutting board, lower heat a bit, and add your bread slices.
  2. While your bread toasts, finely chop the cooked garlic and combine with the tomato, basil, and remaining olive oil in a small bowl. Taste and add a little salt, pepper, and/or red wine vinegar as desired. (My tomato was far more sweet than acidic, so the vinegar balanced it nicely.)
  3. Flip your bread and toast the other side while your tomatoes macerate a bit. Assemble and enjoy.

Classic Bruschetta

The simplicity of this classic dish is what makes it so perfect. Tragically, I ate my last tomato when I prepared this on Saturday. Here’s hoping tomorrow’s CSA share brings another batch!

Grilled Edamame

I’m writing from my favorite sushi spot which, as luck would have it, is just a few blocks from my apartment. I worked my CSA shift tonight and, despite having just picked up two bags’ worth of glorious fruits and vegetables, hunger compelled me to stop off for some chirashi. The fish was great, as always, but the steamed edamame that came on my platter seemed like a sad afterthought.

This reminded me that I’d been meaning to post about grilled edamame. When last in Baltimore, I dined at a swanky Japanese restaurant with an exceptional happy hour. Edamame were a mere $1.88, so I figured I’d order some to soak up the mystery punch I was drinking. (When in doubt, order the punch.) The edamame that arrived were a revelation. After some liberal sampling, I hazarded that grilling was the key.

As luck would have it, a few days later, I found myself in a beach house with a grill…

Grilled Edamame

As with so many good recipes, this one starts with a cocktail or two. I leave that part up to you and your bartender of choice. Once everyone is good and liquored up, determine that someone should do something about dinner.

Oh wait, that someone is you.

Fortunately, you threw those t-bones in a bowl with a little olive oil, salt, pepper, and a whole mess of garlic before you left for the beach this morning. But there are skewers to be soaked, vegetables to be cut, and shit, you’re almost out of olive oil. Dispatch one of your housemates to a neighboring rental house to scavenge.

In the meantime, pull the bag of edamame in their shells out of the freezer and toss them with whatever oil you have left, some black pepper, and that strange pre-mixed rib rub that seems to come with every beach house. You could defrost the edamame. You could make your own seasoning mix. But this is vacation cooking.

Fire up the grill, taking care not to do the same to your caftan. Noting the charred remains of asparagus, onions, and peppers that slipped through the cracks during previous evenings’ grilling adventures, retrieve the top portion of the broiler pan from the oven and stick it on the grill. When the grill is good and hot, spread the edamame across your makeshift vegetable basket, shut the lid, and sear away.

Discover that your housemate has returned from his mission with olive oil and a stockpile of wine that the folks in the other house didn’t think they could finish before their checkout tomorrow. Don’t mind if you do.

Open the grill and push your edamame around to get an even distribution of tasty charred bits. Note that the grill has mysteriously turned itself off. After attempting to relight the grill, conclude that you’ve run out of propane. Shut the grill and cross your fingers that the carryover heat will be adequate to finish these babies because, now that you think of it, you’re rather peckish.

Contemplate broiling the steaks in the oven. Discard that idea once it’s determined that another housemate is a couple of cocktails behind and can still drive to the big grocery store to exchange the propane tank. Pour yourself another glass of wine and check on the edamame. Lo and behold they are done. And they are good.

Grilled Edamame

How to Eat Cherries (in the Middle of a Heat Wave)

Summer is upon us. On Sunday I escaped from the sweltering city to the slightly less sweltering Hudson Valley. Despite a weekly influx of fresh fruit from my CSA,  I couldn’t resist stopping off at Fishkill Farms for a little pick your own action. The sun was so strong that the strawberries and I were reddening at an alarming rate.
Strawberry Picking

The cherry trees offered some welcome shade and some succulent fruit, though I could have used the help of someone a bit taller. Standing on my tippy toes, I managed to fill a couple of quarts–and also rain quite a few cherries down upon my head.

I left a mixed quart with my little sis in Poughkeepsie and polished off a good quantity on the winding late night drive home along the Taconic Parkway, the supermoon guiding my way. Somehow I managed to reserve enough cherries for one of my favorite recipes.

How to Eat Cherries (in the Middle of a Heat Wave) 

  1. Rinse your cherries and place them in a ceramic bowl in the refrigerator for at least a couple of hours.
  2. Pour yourself a nice glass of rosé  and strip down to your skivvies. (There is a variation on this recipe wherein you simply roll up your shirt, which is acceptable if not quite as delicious.)
  3. Grab the cherries and a juicy novel, crank the fan on high, and sprawl out in the middle of your bed.
  4. Place the chilled bowl of cherries on your stomach and commence to indulge.

If anyone has tips for getting cherry juice out of sundresses and sheets, I’m all ears!

Garden Pea and Spring Onion Purée

This week’s CSA share brought green onions, also known as spring onions. While one can just use them in place of regular onions, I wanted to take advantage of their delicate flavor and natural sweetness. Shelled peas at the farmers market provided inspiration.

Garden Pea and Spring Onion Puree

Garden Pea and Spring Onion Puree

  • 1 1/2 cups fresh shelled peas
  • 3 tablespoons coconut oil
  • 1/2 tablespoon Herbes de Provence
  • 2 spring onions, white parts diced and green parts reserved for future use (alongside radishes in a bulgur salad, for example)
  • 1 scape, thinly sliced
  • 1 teaspoon white wine vinegar or lemon juice
  • 6 mint leaves
  • salt and pepper
  1. Bring a small pot of well-salted water to a boil and add the peas. Simmer for two minutes or so and then rinse quickly under cold water to stop the cooking. The peas should be bright green and still firm.
  2. Saute the spring onions in 2 tablespoons of coconut oil over medium-low heat, taking care not to let them brown. (You could use some other light oil, but the coconut oil really brings out the sweetness of the onions and the peas.) When your onions are wilted, add the scape and cook for a couple of additional minutes. Then crush and sprinkle in the Herbes de Provence, allowing the oil to rehydrate the dried herbs.
  3. Toss the onion mixture, the remaining tablespoon of coconut oil, the vinegar, the mint and all but a tablespoon of the peas into the food processor. Gradually add water until the mixture is just loose enough to catch on the blades. (I’d guess that I ended up using about 1/3 cup.) Add salt and pepper to taste and continue processing until you have an even texture but not a true purée.
  4. Stir in the remaining peas, garnish with a sprig of mint and serve with toast points. (I went with whole wheat sourdough sliced thinly and toasted in a cast iron skillet with a little coconut oil.)

I am happy to report that this pairs nicely with a semi-dry Riesling, gin and tonics with rhubarb simple syrup and a dash of orange bitters, or your morning coffee.

Rhubarb Gin and Tonic

End-of-Semester Snacks

It’s the tail end of my first semester of graduate school. In hindsight, it should have occurred to me that this would coincide with the end-of-year fundraising push at work. I have a lot to accomplish over the next eleven days and very few unscheduled hours during which to accomplish it all. My dining table has been converted into a staging ground for my research papers. My sink is full of dirty dishes from the snacks that I’ve been meting out as rewards. Actual meals have fallen by the wayside, primarily because cooking would just be another form of procrastination.

Tonight for dinner, I reverted to two of my favorite snacks. The first is a graham cracker with crunchy peanut butter and raw honey. (Sometimes I substitute raisins for the honey, but I am out of raisins owing to an unfortunate pantry moth situation.) I chased this with half of an avocado filled with half a tablespoon of very good quality aged balsamic vinegar and sprinkled with fleur de sel. These two snacks provide solid nutrition and, when paired with a glass of Spanish Garnacha and a streaming episode of 30 Rock, will hopefully ward off that dream about showing up to your last class with an incomplete research paper and no pants.

Avocado

Moroccan Meze, Part 2

From what I can tell, communities surrounding the Mediterranean each have their own variation on an eggplant dip. I have yet to meet one I didn’t like. This version is seasoned in a Moroccan style and pairs quite nicely with my date and lamb kaftah, but you could easily use the same technique to very different effect by altering the spices.

Roasted Eggplant Dip

  • 3 large eggplant
  • 1 large red onion
  • 2 tomatoes
  • 1 tablespoon harissa (sriracha or other chile paste would do in a pinch)
  • 1/2 tablespoon toasted cumin seeds, ground
  • 1/2 tablespoon dried sumac (or some lemon zest)
  • 1 teaspoon smoked paprika
  • 1 teaspoon smoked salt
  • 4 tablespoons olive oil
  • red wine vinegar
  • salt and pepper
  1. Preheat oven to 350 degrees. Prick eggplant all over with a fork and place in jelly rolls pans or roasting pans in oven. Roast until the eggplant start to collapse (approximately 45 minutes to one hour), flipping occasionally. When cool enough to handle, scoop the flesh out and set in a fine mesh strainer for at least one hour.
  2. In a small baking dish, combine sliced onion and tomatoes with 2 tablespoons olive oil. Roast in oven, stirring occasionally, until onions are soft with crispy edges. Chop this mixture so that it is almost a paste.
  3. Add the drained eggplant, onion and tomato mixture, olive oil and spices to a bowl and mash well with a potato masher. Adjust seasoning with salt, pepper and red wine vinegar to taste.

The kaftah and eggplant were both unctuous and a little spicy, so I decided to make a quick yogurt dip to balance out the flavors. I combined a cup of labaneh (full-fat strained Greek yogurt would work) with the zest of two lemons and the juice of one. It worked like a charm.

Sadly, I failed to take a proper photo of either of these dishes, but that’s them, along with the kaftah, in the upper right quadrant of my refrigerator.

Portable Moroccan Meze

Last Monday’s class included a discussion of Reflections on Fieldwork in Morocco, which chronicles Paul Rabinow’s experience conducting anthropological research in Morocco in the late 1960s. This particular course is from 6:45pm to 8:25pm–prime eating hours. At the beginning of the semester, we agreed to take turns bringing snacks to help us power through. I was up last week.

Some of my fellow students in the NYU Food Studies program are professional chefs. I’d be lying if I said that I didn’t feel a certain amount of pressure. Clearly, it needed to be Moroccan or, at least, Moroccan-ish. I’ve had success with a few variations on a tajine, but this seemed highly impractical given that I had to put in a full day at the office and would not be able to reheat anything. I also did not want to endanger my classmates’ notebooks and iPads.

I studied in Jerusalem for six months when I was an undergrad and have fond memories of meze–elaborate spreads of small dishes that are common throughout the Mediterranean and Middle East. Think hummus, olives, stuffed grape leaves, falafel and yogurt-based dips. Meze can be the precursor to a meal or, as is my preference, a meal unto itself.

Lamb and Date Kaftah

  • 1 pound ground lamb
  • 1/2 medium red onion, finely diced
  • 1/2 cup bulgur
  • 20 pitted, minced dates (currants or raisins would work too)
  • 1/2 cups toasted pine nuts
  • 1 bunch curly parsley, roughly chopped
  • 2 tablespoons minced fresh mint or 1 tablespoon dried
  • 1/2 tablespoon toasted coriander seeds, ground
  • 1/2 tablespoon toasted cumin seeds, ground
  • 1 tablespoon dried sumac (lemon zest could be substituted) 
  • 1 tablespoon Aleppo pepper and 1 teaspoon cayenne (or to taste)
  • 1/2 tablespoon turmeric
  • 2 whole allspice, ground
  • 1/2 teaspoon cinnamon
  • 1/2 teaspoon ground clove
  • 1 pinch nutmeg
  • salt and pepper to taste
  • canola oil
  1. Pour 2/3 cups boiling water over the bulgur in a small bowl and let sit while you prep your pine nuts, dates, onions, herbs and spices.
  2. Add everything except the canola oil to a medium work bowl and mix gently with you hands. Let this chill in the refrigerator for at least half an hour.
  3. Fill a large cast iron skillet with canola oil to approximately 1/4 inch and bring to medium-low heat. Working in batches, form the lamb mixture into small patties and add to the skillet. Cook until nicely browned on one side, flip and repeat. Drain on paper towels.These would make great sliders. Formed into balls and served with toothpicks, they would be a delightful hors d’oeuvres for a cocktail party. A couple of months ago, I made a similar version and served them hot over a Moroccan-seasoned ratatouille.In this case, I packed the kaftah in additional layers of paper towels and stashed them in the refrigerator along with a roasted eggplant dip and a labeneh-lemon dip. Another classmate brought a spicy carrot salad, mint tea, dates and almond cookies. We served it all with white and whole wheat pitas. It was a delightful feast.

The Hungover Fig

I’m kicking off a two-week vacation with a few days in Baltimore visiting good friends who are serious foodies.  Last night we hosted a truly decadent dinner party that featured two kinds of roasted bone marrow and a whole lot of wine.  Unsurprisingly, I woke up feeling less than stellar this morning.

I dragged myself downstairs for coffee and was delighted to recall that one of our dinner guests had left fresh figs from her yard.  I trimmed the stems off and scored the figs into quarters before topping them with some rather pungent sheep’s milk feta and a drizzle of raw honey.

I ate this standing at the kitchen counter.  Midway through, one of my hosts appeared and tipped me off that there was fresh mint growing in the backyard, so I sprinkled some small leaves over the top.  This dish is so simple and so delicious and works with all kinds of cheese.  I am particularly fond of ricotta and soft goat cheese.

As I polished off the last of the figs, I remembered that we scored an invitation for brunch and fig harvesting on Saturday before I head down to the beach.  Life satisfaction is high at the moment.