Quick Roasted Roots

By Monday afternoon it was clear that this was going to be a rough workweek. I made it home by 8:00 the next night, but I still had some urgent work to do. And I was seriously hungry. In the crisper, I found some (slightly moldy) turnips, carrots and a garlic bulb that were left over from a trip to the farmers market a few weeks back. I could work with this.

Image

Most home cooks know how to roast root vegetables in the oven. (Toss the vegetables in olive oil, salt and pepper; spread them in baking pan; and roast at 400-450 until they are cooked.) But sometimes it’s just too hot or you are just in too big a hurry to consider turning on the oven. Here’s a basic technique for roasting root vegetables on the stovetop.

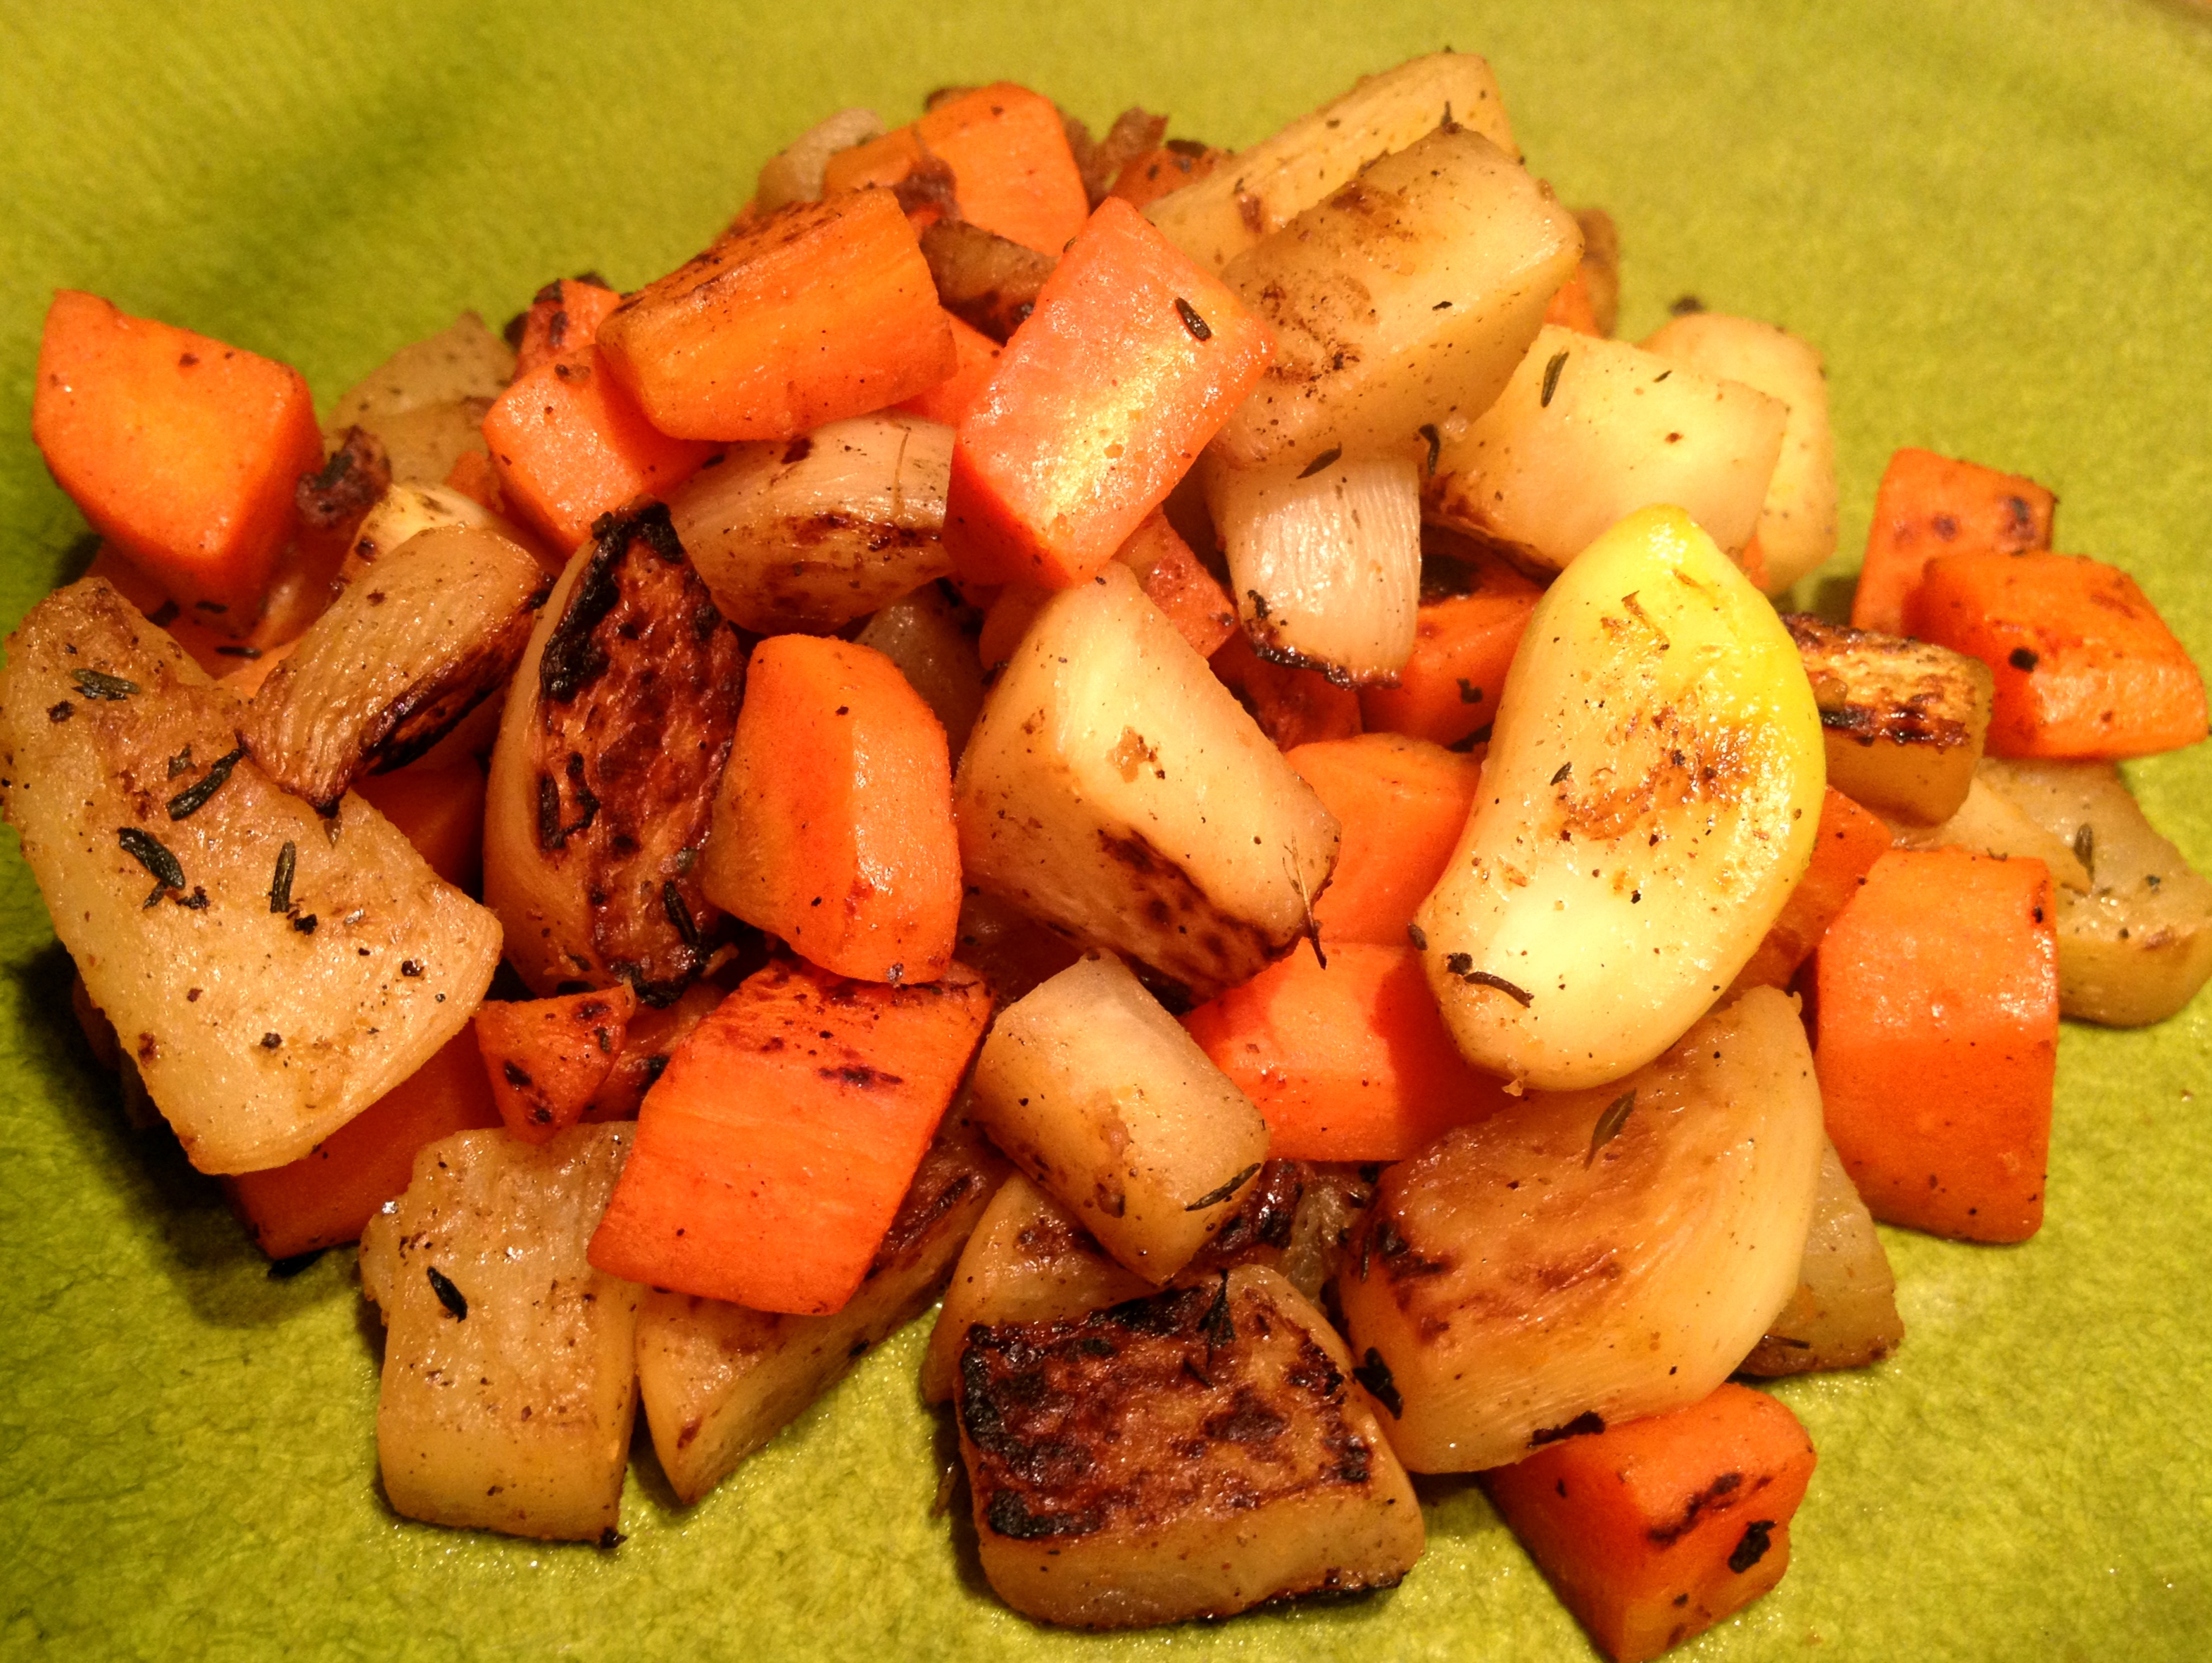
  1. Bring a cast iron skillet up to medium heat with just a little oil. In this case, I used a tablespoon of olive oil.
  2. Add your aromatics. I used six whole peeled garlic cloves, which I toasted in the oil until they were fragrant and starting to brown. You could also use onion, shallots, garlic scapes, leeks, etc.
  3. Dice your roots and add to the pan. I used three medium turnips (with the moldy bits cut off) and seven carrots, which yielded enough food to pack away an extra serving for some future food emergency. You could also use rutabaga, potatoes, beets, parsnips, any hard squash, yams, fennel, and probably a bunch of other things I’m not thinking of.
  4. Stir occasionally. You want to allow each piece prolonged contact with the cast iron to promote delicious crispy bits. This also allows you time to log into your work email and put out a few fires.
  5. Add seasoning. I used sea salt, cayenne, black pepper and dried thyme. Fresh herbs would be nice–rosemary, parsley and the like.
  6. Make it a meal. The cupboard is pretty bare at the moment, so I went with a frozen Boca Burger that had seen better days. A piece of sausage, a turkey burger or a fried egg would work. Just push your vegetables to one side of the pan to make room to cook your protein and you’ve got some seriously easy cleanup!

Thirty minutes after walking in the door, I had finished work for the night and was sitting down to a healthy dinner. And lo, there was a glass worth of Vouvray left in the bottle.

Whore’s Radishes

Spending the better part of a day preparing a lavish dinner for friends is a meditative and restorative activity for me. But at 8:30 on a Tuesday night, I just want to get something tasty and nutritious into my stomach as quickly as possible.

Image

I opened the fridge to discover that the greens atop these radishes were beginning to wilt. If you haven’t caught on by now, I am a bit obsessed with dark leafy greens. Last summer, unable to bear the thought of throwing out such a bounty of greenery (and after having Googled to ensure that they were not poisonous), I decided to try eating the radish greens. They’ve got a slightly rough texture and a bitter, peppery flavor similar to the radish itself, but much more subtle. That is to say, they are delicious.

Tonight I prepared the radishes and radish greens alla puttanesca, which translates as “whore’s style.” There are a number of variations on this, but they all include a variety of savory ingredients–including tomatoes, garlic, onions, chiles, anchovies, capers and olives. Note that these are ingredients that keep well in the pantry or fridge, ready to deliver a burst of flavor whenever you need it.

For this dish, I added a couple of anchovy filets, a tablespoon of olive oil, half a tablespoon of butter (to promote browning), one thinly sliced garlic scape (regular garlic would have been fine, but it’s what I had), and a big pinch of red pepper flakes to a cast iron skillet over medium heat. After a few minutes of stirring, I had a nicely seasoned browned butter. In went the radishes, cut into wedges. I was getting some nice color on them, but they weren’t cooking as quickly as I had hoped, so I added some water to help them along. When the water was nearly gone, I added the radish greens (which you want to wash a little more thoroughly than I did, as they tend toward gritty) and sautéed them. At the last moment, I threw in a tablespoon of capers and 10 or so oil-cured olives that I had chopped and pitted. I finished the dish with some ricotta cheese for a little protein. This would be awesome with some whole wheat pasta.

Image

Fromage Fort

Image

This one is so easy I feel a little guilty. I recently hosted a wine tasting at which I served a selection of cheeses.

OK, fine, I did more than taste the wine. It was all I could do to toss the remaining cheese hunks into a plastic container and shove that into the fridge before my face hit the pillow. Four weeks later, I unearthed the container and found a triple-cream Brie, some aged Gouda and a little nugget of Fourme d’Ambert that were beginning to assume one another’s identity.

I had a hazy memory of a French cheese dip that was made for just such a situation. A quick search led me to fromage fort. Traditionally, it’s made with white wine, garlic, fresh herbs and black pepper. I skinned the Brie and pinched off hunks that I dropped into the food processor along with the Fourme d’Ambert and the aforementioned wine and seasonings (thyme being the only fresh herb I had on hand). The Gouda was hard, so I grated it with a rasp—one of my all-time favorite kitchen tools. I ran the processor for a few minutes and sampled the results, which were a little boozy. I had some leftover Ricotta and a rapidly aging Romano in the fridge, so in they went to provide balance.

Now it was starting to taste good. Never one to leave well enough alone, I decided to see what I could do to improve upon the flavor and create a nice complement to tomorrow night’s Sazeracs and gumbo. Dried mustard, cayenne, smoked paprika and just a pinch of sugar created a well-balanced cheese dip that you could eat with a spoon. I did.

Plantanos Maduros

I’m not a big dessert person, but last weekend I took a stab at a plantain tart as part of my Cinco de Mayo menu. I had purchased the plantains a few days ahead of time and left them (along with my avocados) in a paper bag with a couple of apples in the hopes that they would ripen. Not so much. The plantains’ disappointing starchiness was offset by some vanilla ice cream, homemade cajeta and a liberal dose of margaritas. (The guacamole, on the other hand, was perfection.)

After 10 days languishing on my counter, the last plantain had turned a solid black and was begging to be consumed. I took a small nonstick skillet and brought it up to medium temperature with half a tablespoon of butter inside. I peeled the plantain, sliced it an angle and dropped the slices into the pan. Once they had started to brown and crisp up, I flipped them. A few minutes later, a tablespoon of apple cider vinegar went in to deglaze the plan and steam the plantain. I tossed a pinch of salt in and flipped the slices a couple of times to glaze them with the reduced butter/vinegar mixture. They went onto a plate where I drizzled them with a tablespoon of the leftover cajeta. You could do worse for a Monday night dinner.

Kale for Breakfast

I could eat kale for every meal and be a happy girl. Braised kale topped with a fried egg is one of my favorite quick weeknight dinners. But something about this kale’s particular curliness, coupled with the items left over from last weekend’s Cinco de Mayo cooking extravaganza, suggested a different technique.

I brought a cast iron pan up to medium temperature and added just a little olive oil. In went some thinly sliced red onion, followed a little later by a thinly sliced jalapeno pepper. I rinsed the kale, bunched it and finely shredded it just before adding to the pan. I added some pepper and smoked sea salt and let it cook, stirring occasionally, while I prepped the rest of the dish.

A couple of months ago, while lolling on my couch nursing a hangover, I found myself pondering why restaurant scrambled eggs are so delicious. A Google search led me to Gordon Ramsay’s technique, which yields light, creamy eggs and is pretty much foolproof. Basically, you take a pot (not a pan), crack your eggs directly into it, add a knob of butter and bring it up to medium heat, stirring frequently with a heatproof spatula. Add salt at the end. Yep, that’s it. And you don’t have to use the rather excessive amount of fat that he suggests. In this instance, I used a single jumbo egg, about half a teaspoon of butter and just a dash of salt.

By the time I finished the eggs, the dry-frying technique had imparted a crispy, slightly smoky quality to the kale. I dropped it into a bowl and drizzled a little good quality olive oil (from Frankies) on top. I nestled my scrambled egg and added some sliced avocado for a little extra richness. It was delicious.

Quick Springtime Lunch

Image

My local farmers market is really starting to pick up. Mindful of the excessive amount of kale still in my fridge, I limited myself to radishes, scallions, turnips, carrots and thyme. (More on those last three later.) Having hit the gym on the way home, I wanted a quick but virtuous lunch.

I started with half of a whole wheat flatbread. I am a big fan of these because they keep in the refrigerator pretty much forever and can be dolled up an infinite number of ways. I heated up my cast iron skillet and toasted the bread on both sides before applying a layer of ricotta cheese, which is a great source of quick protein that also keeps in the fridge. I added a layer of thinly sliced radishes. In a moment of inspiration, I decided to use the already-hot skillet to grill strips of scallion in a teaspoon or so of olive oil. Freshly ground pepper, fleur de sel and a light drizzle of truffle oil topped my springtime tartine.

It was fresh but lush, and it screamed out for a crisp white wine. Lo and behold, there was an open bottle of Gruner Veltliner on the top shelf of the refrigerator. OK, maybe lunch wasn’t all that virtuous.